Making an App in python using Kivy - Part 1
In the summer semester for the Computing for Mathematics module we were required to create ‘companies’ of 4. The goal was for each company to create a ‘product’ which involves programming and mathematics. For this my company decided to make an mobile app, to aid with learning mathematics through giving content and quiz.
Once we have decided to make the app I looked at varies GUI frameworks based on python which we could use. From this list we decided that Kivy would be best suited for what we required.
Creating a basic Kivy app
Below is the code for a basic app that has the label of ‘Hello World’.
import kivy
kivy.require('1.0.6') # replace with your current kivy version !

from kivy.app import App
from kivy.uix.label import Label


class MyApp(App):

    def build(self):
        return Label(text='Hello world')


if __name__ == '__main__':
    MyApp().run()
The output is rather simple
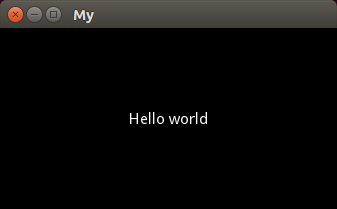
On line 11 where we create a label, for kivy an label is consider an widget and we are giving it the property of ‘Hello World’ for text. We are also doing returning this in the build method of an app class. This is important as when the app is built an widget is required to be returned in order to be the root widget.
Kv Language
Kivy uses it’s own Kv Language in order to create widget trees. When testing out different layouts using the Kv language makes it easier for you to experiment with different widgets.
For example here I have included an example of using Kv language to create an layout.
<Demo>:
    cols: 1

    BoxLayout:
        orientation: 'vertical'
        Button:
            size_hint_x: 0.4
            pos_hint: {'x': 0}
            text: 'pos_hint: x=0'

        Button:
            size_hint_x: 0.2
            pos_hint: {'center_x': 0.5}
            text: 'pos_hint: center_x=0.5'

        Button:
            size_hint_x: 0.4
            pos_hint: {'right': 1}
            text: 'pos_hint: right=1'

    BoxLayout:
        Button:
            size_hint_y: 0.4
            pos_hint: {'y': 0}
            text: 'pos_hint: y=0'

        Button:
            size_hint_y: 0.2
            pos_hint: {'center_y': .5}
            text: 'pos_hint: center_y=0.5'

        Button:
            size_hint_y: 0.4
            pos_hint: {'top': 1}
            text: 'pos_hint: top=1'
from kivy.uix.gridlayout import GridLayout
from kivy.app import App
from kivy.lang import Builder

Builder.load_file('boxlayout-kv-example.kv')

class Demo(GridLayout):
    pass


class DemoApp(App):
    def build(self):
        return Demo()

if __name__ == '__main__':
    DemoApp().run()
This produces a windows with buttons in several places.
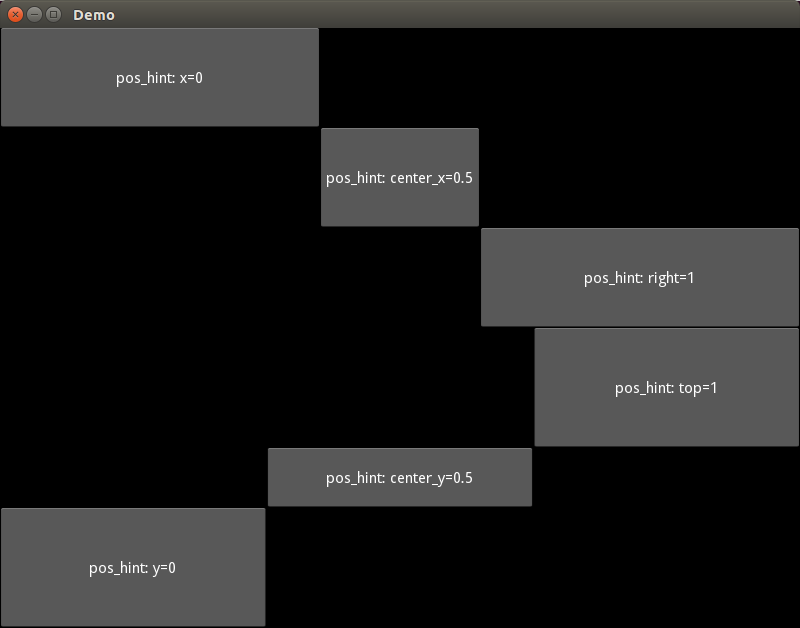
Firstly we see that the root widget is call Demo which is a grid layout with 1 column.
Next looking at the .kv file we can see that the widget Demo has 2 children. Both of which are boxlayouts.
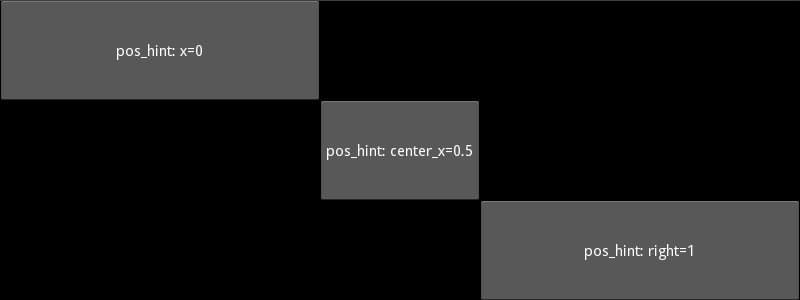
The first boxlayout has been set to vertical, the default is horizontal. Then 3 buttons have been added. As shown below.
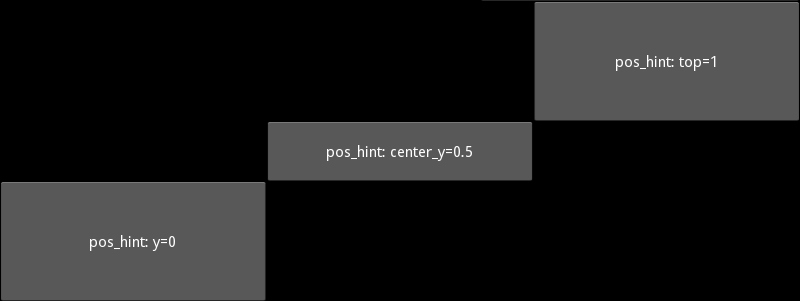
The second boxlayout is left to it’s default settings and have 3 buttons as it’s children. As shown below.
More about the different widgets will be explained in a later part.
Depending on your needs you can do either of the following:
- Just use python code and ignore the KV Lang.
- Mix python code and KV Lang for layouts.
- Use KV Lang for all layouts.
I found this useful to only use the python code as I was building the layout depended on how many items there were in a database.