Introduction to HTML - Part 1
If you haven’t already read the overview of web technologies tutorial I highly recommend it so that you get a birds eye view of web development as a whole and how this fits into the whole picture.
If you already have read the overview then you know that HTML is responsible for representing all the content on a webpage. Most other technologies are designed to work with it to some degree so it’s important to understand at least the basics even if you don’t ever use it much after this.
The basics
If you have ever looked at the HTML of a modern website, I wouldn’t be surprised if you thought that HTML is really complicated, however at its core it’s really quite simple.
I think the best way to introduce you to HTML is to get you to follow along and build your own webpage. So open your favourite text editor and type the following:
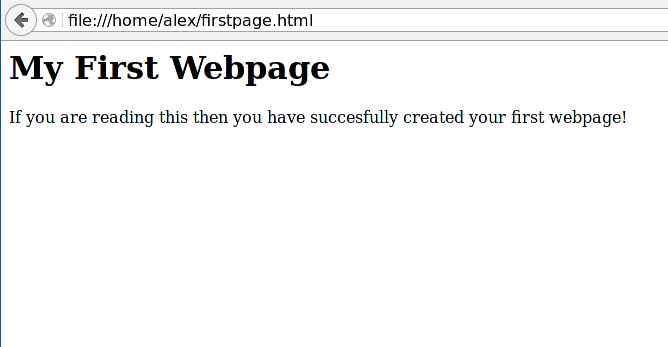
<h1>My First Webpage</h1>

<p>
    If you are reading this then you have succesfully created your first
    webpage!
</p>
Once you have done that save it as firstpage.html and open it using your web
browser. You can do this by either:
-
Using your file manager, right click on the file you just created and choose
Open Withand then select your web browser. -
In your web browser’s address bar type
file://followed by the filepath to the file you just created.
As long as everything worked you should see something like this:
The tags
HTML is all about tags. Tags surround text to tell the web browser what sort of
content is contained within them. The most important thing to remember about
tags is that every open tag <tagname> needs to have a matching closing tag
</tagname> - Notice how the closing tag starts with a /.
Otherwise all the elements on your page will blur into each other
for example see what would would’ve happened if you forgot the closing h1 tag
in your webpage above:

So that’s most of the syntax out of the way, now all that’s left to do is introduce all the tags that you can use and what they are for:
-
Header tags: There are six header tags, which are used for titles of pages, blog posts, sections etc. Starting with
h1being the largest all the way down toh6being the smallest. -
Paragraph tags:
p, this tag is used to mark where paragraphs start and end in the main text of your article. The majority of your actual content goes in these. -
Ordered lists: Slightly more complicated than the other tags you’ve seen so far, ordered lists (lists with numbers) are made up of two tags.
olwhich tells the browser you are starting an ordered list andlito represent each item in the list. -
Unordered lists: Similar to ordered lists, unordered lists (bullet points) use two tags
ulto say you’re starting a list andlifor each item in the list.
To demonstrate how each of these work let’s update our webpage. Add the following
to the bottom of your firstpage.html file:
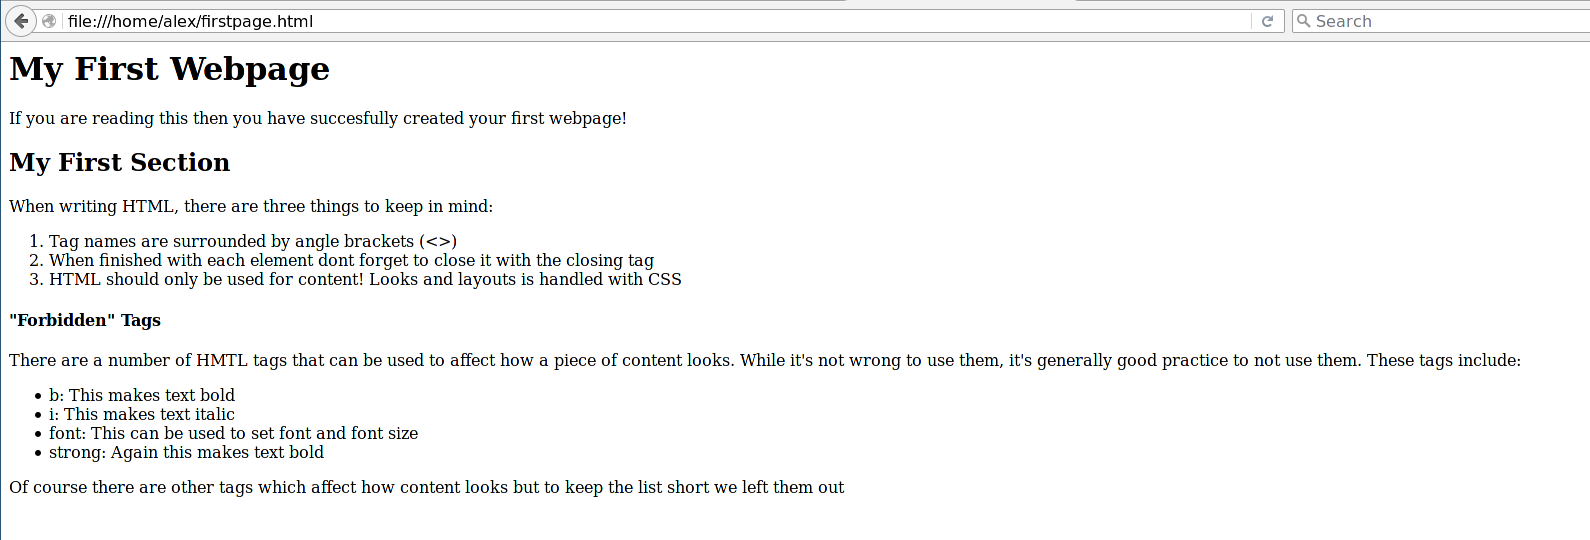
<h2>My First Section</h2>

<p>When writing HTML, there are three things to keep in mind:</p>

<ol>
  <li>Tag names are surrounded by angle brackets (<>)</li>
  <li>When finished with each element dont forget to close it
      with the closing tag</li>
  <li>HTML should only be used for content! Looks and layouts
      is handled with CSS</li>
</ol>

<h4>"Forbidden" Tags</h4>

<p>
  There are a number of HMTL tags that can be used to affect how a piece of
  content looks. While it's not wrong to use them, it's generally good practice
  to not use them. These tags include:
</p>

<ul>
  <li>b: This makes text bold</li>
  <li>i: This makes text italic</li>
  <li>font: This can be used to set font and font size </li>
  <li>strong: Again this makes text bold</li>
</ul>

<p>
  Of course there are other tags which affect how content looks but to keep
  the list short we left them out.
</p>
Save your file and refresh your browser, hopefully you should see something like this:
Those were the tags that you would need to write most of the content you would see in a typical article, except for links and images of course.
The attributes
It wouldn’t be much of a website without a few links now would it! Links work slightly differently to other tags since you need to provide a bit of extra information in the tag to tell the browser what you are linking to.
So that you have something to link to, let’s create a second page. Create a new
file called secondpage.html in the same folder as firstpage.html and put the
following HTML inside:
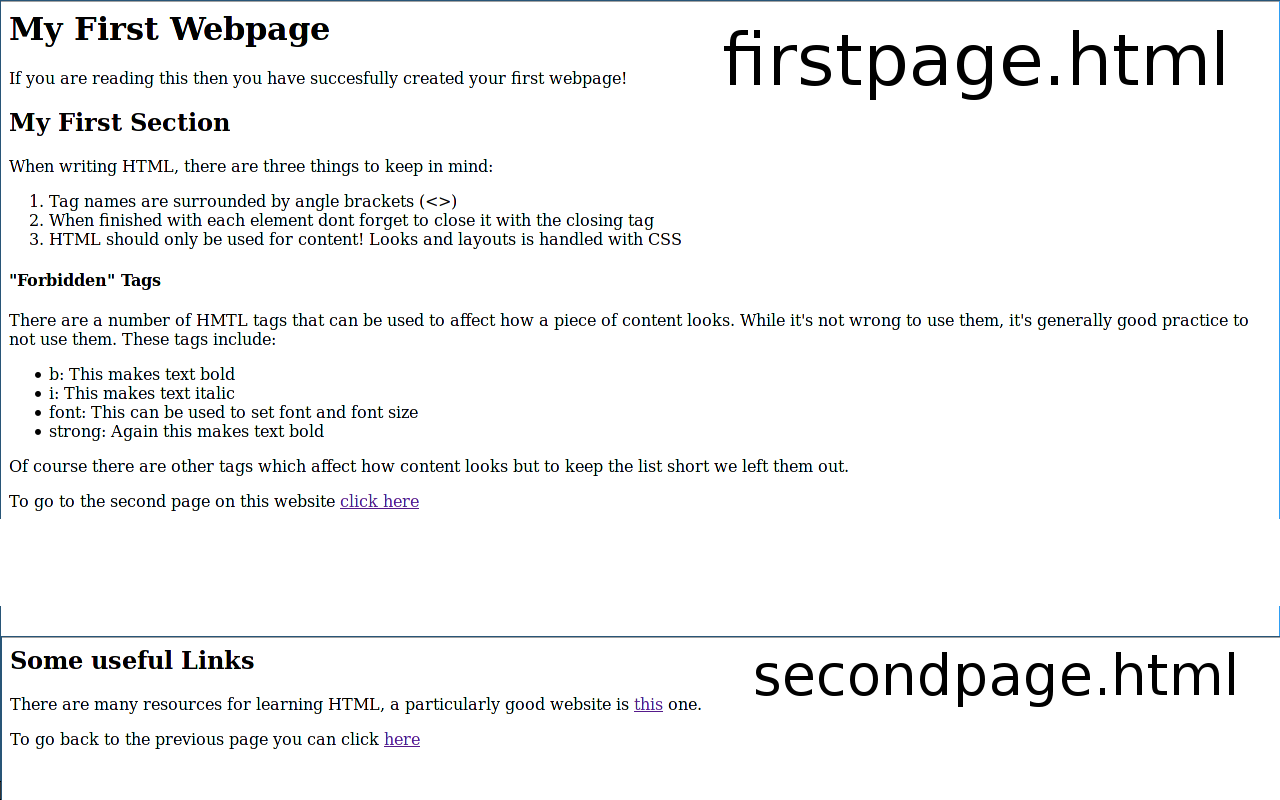
<h2>Some useful Links</h2>

<p>
   There are many resources for learning HTML, a particularly good website is
   <a href="http://www.w3schools.com/html/">this</a> one.
<p>

<p>
   To go back to the previous page you can click
   <a href="firstpage.html">here</a>
</p>
And add the following to the bottom of firstpage.html:
<p>
   To go to the second page on this website
   <a href="secondpage.html">click here</a>
</p>
So if everything worked you should see something like this:
You may have already guessed, the a tag is used to add links to a webpage. The
text between the a tags is what the browser displays as a link. The
actual link is added as an attribute which goes inside the angle brackets
which surround the tag name.
Before we finish I want to introduce you to to the img tag which allows you to
embed images into your webpages. So grab an image that you would like to add to
your webpage and put it in the same folder as the previous two files and rename
it to image.jpg then add the following to the bottom of one of your HTML files:
<img src="image.jpg" alt="My Image"/>
Note how the img tag is something of an exception, it is its own open and
closing tag, so it’s convention to add the / to the end of the image tag. Also
note how we used two attributes in this one:
src: To specify the address to the image we wish to include in the webpagealt: To specify text we would like the browser to display if it can’t load the image
Reload your page and hopefully the image you chose will be displayed at the bottom of whichever page you added it to.
That’s it for now I hope this was helpful and keep an eye out for future tutorials.